In a nutshell
- ✨ Baking soda whitens tiles fast by combining mild alkalinity and a gentle abrasive action—great for glazed tiles, but take care on natural stone.
- ⏱️ Two-minute method: mix a 3:1 paste, spread thinly, wait 1–2 minutes, scrub 30–60 seconds, then rinse and buff dry; do not add vinegar during the dwell.
- 🧽 For grout and stains: use a thicker paste, a soft toothbrush, and optional 3% hydrogen peroxide; tackle limescale separately with citric acid or vinegar after rinsing.
- 🛡️ Safety and savings: low-tox, budget-friendly, and eco-friendly; ventilate, wear gloves if sensitive, avoid scouring pads, and store soda dry.
- 🌟 Results that pop: rapid, brilliant shine with a cleaner-looking glaze; patch test delicate finishes and keep acids and alkalis in separate steps.
There’s a humble hero under your sink that can make tired bathroom tiles look freshly installed. In British homes, bicarbonate of soda—better known as baking soda—has long been a cupboard staple for cooking and deodorising. It’s also a fast, effective cleaner. In just two minutes, a quick paste can lift soap scum, hard-water haze and dull grime from ceramic surfaces, leaving a brighter, low-sheen finish that looks professionally polished. The method is simple. The science is solid. And the results are startling. For busy mornings, quick turnarounds between guests, or a rental inspection, this tiny hack delivers big shine without harsh fumes. Here’s how it works, why it works, and what to tweak for grout and delicate stone.
Why Baking Soda Works on Bathroom Tiles
On the surface, baking soda seems unassuming. Chemically, though, it’s a mild alkali (sodium bicarbonate, pH around 8.3) and a gentle abrasive. That double act matters. The alkaline character helps break down fatty residues—think body oils, shampoo polymers, and soap scum—loosening the film that makes tiles look grey. Meanwhile, its fine crystalline structure provides micro-scrubbing power that buffs the glaze without gouging it. The result: faster removal of grime with less elbow grease. Crucially, baking soda is kinder to ceramic than many gritty powders, so you get lift without scratches.
There’s more. Bicarbonate neutralises odours and buffers acids, which is useful if your bath has seen a little too much limescale. It doesn’t dissolve calcium deposits like vinegar does, but it clears the gunk that hides limescale shadows and makes them appear worse. On glazed tiles, you’ll notice instant brightness; on grout, it clears surface soils so targeted treatments can reach deeper. For most sealed ceramics, it’s safe and effective. Just take care with natural stone (marble, limestone, travertine), where any abrasive action or alkalinity can disturb the finish. Always patch test first.
The Two-Minute Whitening Method, Step by Step
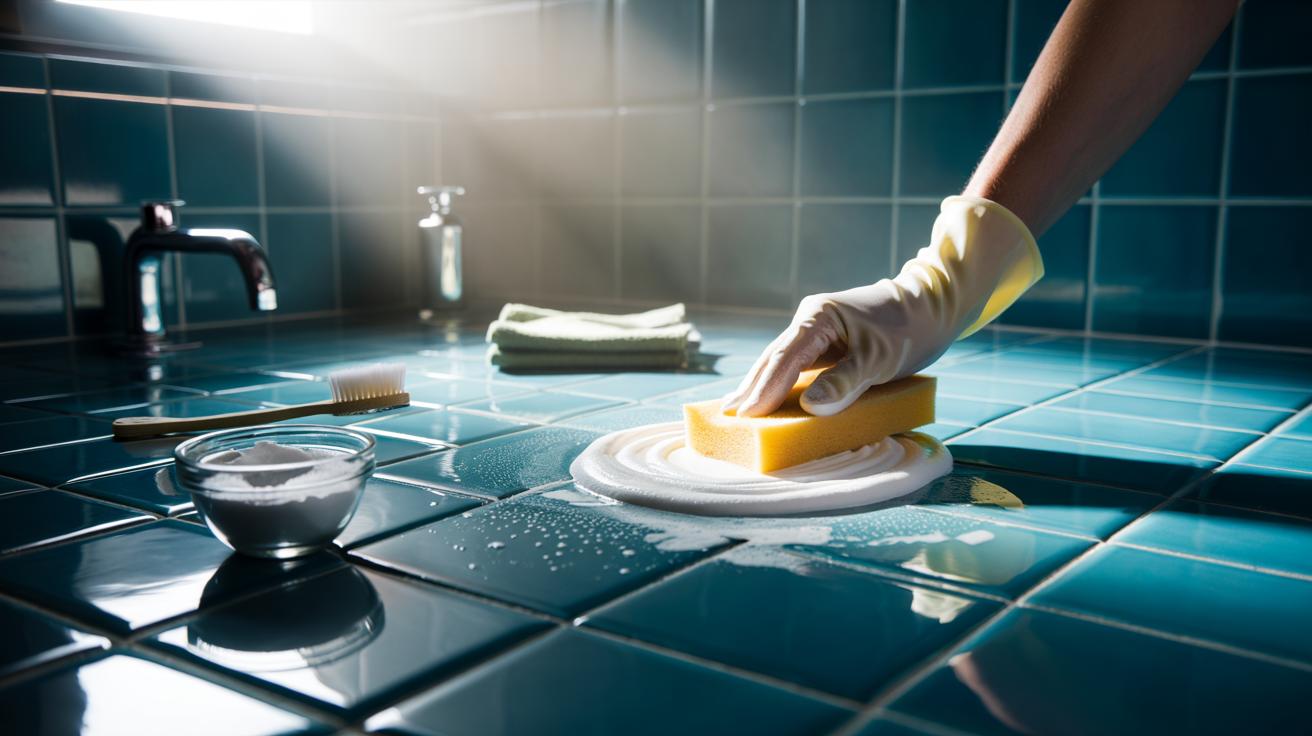
Start with a surface wipe to remove hair and loose dust. Mix a quick paste: roughly three parts baking soda to one part warm water. You want a spreadable, non-drippy cream. Lightly mist the tiles so the paste doesn’t dry on contact. Using a soft sponge, smear a thin film across the area you’re tackling—about a square metre is ideal for speed. Give it a one- to two-minute “dwell time” to let the alkali begin loosening grime. Then, in brisk circles, buff the surface. For edges and grout lines, switch to an old soft toothbrush. Rinse with warm water and buff dry with a microfibre cloth for that signature, streak-free gleam.
Do not add vinegar during the two-minute phase; it neutralises the alkali and kills cleaning power. If you love a vinegar spritz for sparkle, use it sparingly after rinsing and drying, not while the paste is working. The process is fast, light on effort, and astonishingly effective on soap film. Expect a brighter, cleaner-looking glaze and a crisp contrast with grout lines. Below is a snapshot you can pin to a cupboard door.
| Step | What to Use | Ratio/Time | Tip |
|---|---|---|---|
| Mix | Baking soda + warm water | 3:1 paste | Thick cream, not runny |
| Apply | Soft sponge | Thin film | Pre-dampen tiles lightly |
| Wait | Dwell time | 1–2 minutes | Do not add vinegar now |
| Scrub | Sponge/soft brush | 30–60 seconds | Use a toothbrush for grout |
| Finish | Rinse + microfibre | Immediate | Buff dry for shine |
Adapting the Method for Grout, Stone, and Stubborn Stains
Grout demands a slightly different approach. Because it’s porous, soils bed in. Make a thicker baking soda paste and press it along the lines with a brush, letting it sit two to five minutes before scrubbing. For dingy, non-mould staining, a paste blended with a few teaspoons of 3% hydrogen peroxide can brighten without the harshness of bleach. Always patch test peroxide on an inconspicuous grout section first. If mould is present, dry the area first and ventilate well; peroxide helps, but allow extra dwell time and avoid mixing with other cleaners.
For natural stone—marble, limestone, travertine—err on the side of caution. Even gentle abrasives can mar honed finishes. Try a very dilute solution (a light bicarb wash) and minimal pressure, or reach for a stone-safe cleaner instead. Silicone seals respond well to the standard paste, but use fingertip pressure and rinse promptly. Hard limescale? Bicarbonate isn’t your primary weapon. After your soda clean and a full rinse, you can spot-treat deposits with a citric acid or vinegar solution, keeping it off sensitive stone and metal finishes. Never combine acids with your bicarb paste in one go—alternate steps and rinse between stages to keep chemistry on your side.
Safety, Cost, and Eco Credentials
One of the biggest wins here is cost. A tub of bicarbonate of soda from the supermarket costs pennies per clean, undercutting most specialty sprays while delivering visible results. It’s also a low-tox option that keeps strong fragrances and heavy surfactants out of your bathroom air. That said, smart practice matters. Open a window or run the extractor, wear washing-up gloves if you have sensitive skin, and rinse thoroughly to avoid a light residue film. Avoid aggressive scouring pads; they’ll do more harm than good on glossy tiles.
Storage is simple: keep your soda dry, and only mix what you’ll use. If you later choose to apply a vinegar spritz for sparkle, never trap the mixture in a sealed container—the fizz releases CO₂ and can build pressure. Be wary around gold-plated fittings and exotic finishes; test first, then proceed gently. For households with children and pets, soda is a reassuringly mild cleaning agent, but it still deserves respect—store it out of reach. Used thoughtfully, this eco-friendly staple trims plastic waste, cuts cleaning time, and restores the kind of clean that reads as “hotel fresh” at a glance.
In two minutes flat, baking soda turns dull ceramic from “serviceable” to “sparkling”, clearing the film that steals shine and making your bathroom look brighter, cleaner, more inviting. It’s the rare hack that mixes chemistry with common sense, wallet-friendly costs with noticeably better results. Treat grout with a little extra patience, keep acids and alkalis in separate steps, and buff dry for that final, satisfying gleam. If you’ve tested this two-minute method, where did you see the biggest transformation—and what surface would you like to crack next?
Did you like it?4.5/5 (22)